I spent an entire weekend trying to figure out why my printer suddenly stopped working with my laptop, only to discover the culprit was an outdated driver I never would have found on my own. That frustration is what exactly led me to Driver Booster and one single scan ended up saving me from what would have been hours more of blind troubleshooting.
How I Got Stuck in Driver Hell?
It started small. Well, all of a sudden my printer stopped responding, then my audio started crackling during calls, and finally my graphics card began stuttering during video playback. I assumed each problem was separate, so I tackled them one at a time, uninstalling and reinstalling apps, restarting my router, even considering a factory reset.
Trust me, none of that worked because it did not address the actual issue. Nearly all of it traced back to outdated or mismatched drivers sitting quietly in the background.
Why I Turned to a Driver Updater Instead of Guessing?
Rather than searching driver pages online, I actually needed a direct and simple driver updater. Something that could perform a quick scan of my system and instantly identify every outdated file.
Driver Booster fit that need immediately. It automatically scans a system and finds the correct drivers for every connected device to keep everything running at peak performance, pulling from a database of manufacturer-certified drivers from over 1,200 major brands including Intel, AMD, and NVIDIA. Every driver it installs is verified in two steps, through Microsoft WHQL certification and an IObit security scan, so I wasn’t worried about installing something sketchy.
A few other details sold me on it:
- It supports systems from Windows 11 all the way down to XP, including Windows 10/11 ARM64 devices.
- Its database covers more than 12 million free device drivers.
- It automatically backs up existing drivers before installing anything new, so I could roll back if something went wrong.
- It includes a Game Boost feature that prioritizes gaming-related drivers and components for smoother performance.
How I Fixed My PC With One Scan?
Here is exactly what I did from start to finish, the day I finally gave up on troubleshooting manually.
Step 1: Download and Install
I went to the official IObit Driver Booster page and downloaded the installer, which is a small file that only took a few seconds to download. I ran the setup file, selected my preferred language on the welcome screen, and clicked the main install button. The whole install finished in under a minute.
Step 2: Let Driver Booster Scan
Following the app launch, I clicked Scan, and within moments, the app had scanned my entire system. It pinpointed problematic drivers—some obsolete, some missing, and some not working properly—affecting my graphics, audio, Bluetooth, network, and chipset hardware.
Step 3: Review the List of Outdated Drivers
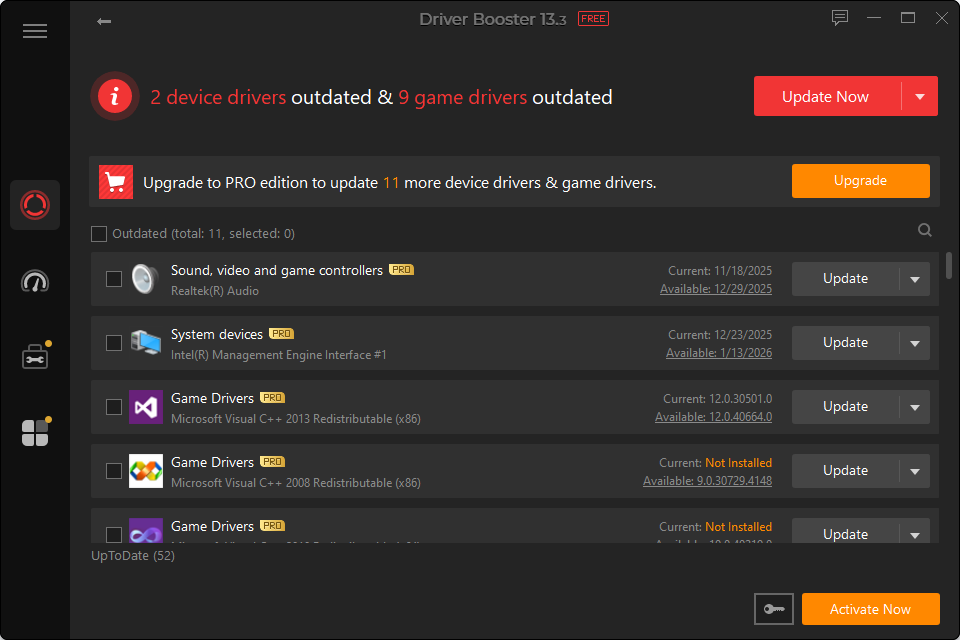
Once the scan finished, it displayed every outdated, missing, or incorrect driver it found,it was color-coded by status so I could immediately tell what needed attention. In my case, it flagged nine drivers on my desktop, including the printer driver that had started the whole mess.
Step 4: Click Update Now
Instead of updating each driver individually, I clicked the Update Now button. It automatically backed up my existing drivers first. Then start downloading and installed the correct replacements. The entire process took about 5 minutes to complete.
Step 5: It Handles Game Components Too
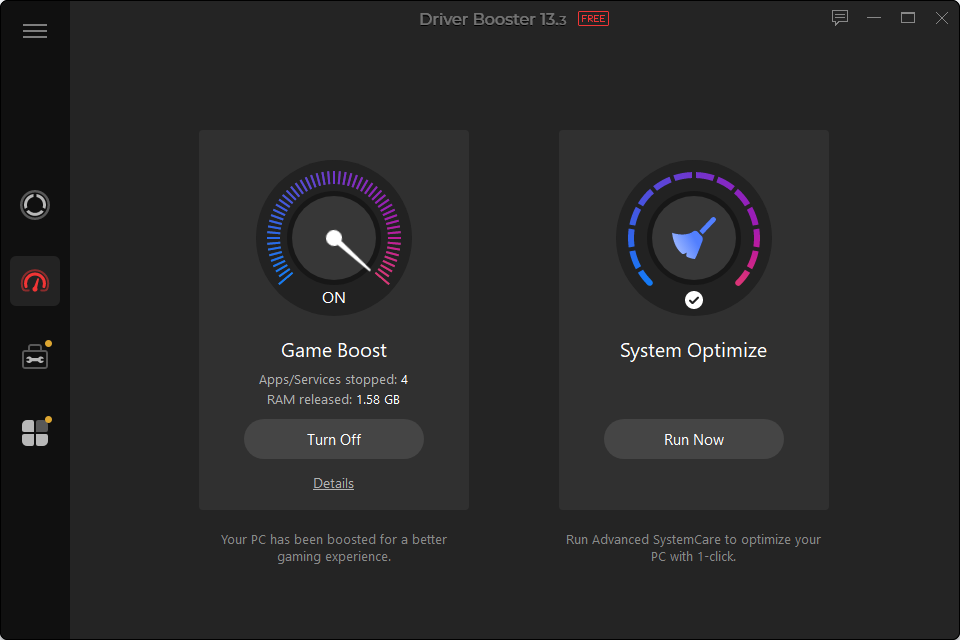
Since I do play games on this laptop, I let Driver Booster check for outdated game components in addition to standard drivers. It automatically prioritizes gaming-related drivers, which explained some of the graphical stutter I had been blaming on my GPU itself.
Step 6: Restart and Test Everything
After the updates finished, I restarted my PC and printer connected without any issue. Also the audio crackling disappeared and video playback ran smoothly again.
Step 7: Set Up a Backup Point Just in Case
Before trusting everything fully, I found that this booster had created its automatic backup and system restore point during the update process. So that, I could roll back instantly if anything acted strange gave me real peace of mind, especially since I had heard mixed opinions from other users about occasional installation hiccups.
Step 8: Schedule Future Scans
To avoid repeating this whole ordeal, I set up a scanning schedule so Driver Booster checks for updates on a regular basis, whether daily, weekly, or at every Windows startup. That way I am not stuck guessing when my drivers quietly fall out of date again.
What That One Scan Actually Saved Me?
If I had kept troubleshooting manually, I would have spent hours hunting down individual driver pages, cross-referencing hardware model numbers, and probably installing at least one wrong file along the way. Instead, one scan identified every problem device at once and fixed all of them in a single batch update.
The printer issue that started this entire weekend turned out to be a five-minute fix once I had the right tool pointed at the right problem.
Why I Keep It Around Now?
I don’t wait for something to break before running Driver Booster anymore. It sits quietly with a scheduled scan running in the background, catching outdated drivers before they turn into another weekend of frustration. If your PC has started acting up in ways that don’t have an obvious cause, running one scan with a proper driver updater is a lot faster than troubleshooting blind, and it’s exactly what saved me from doing just that.